Features
1. Networks
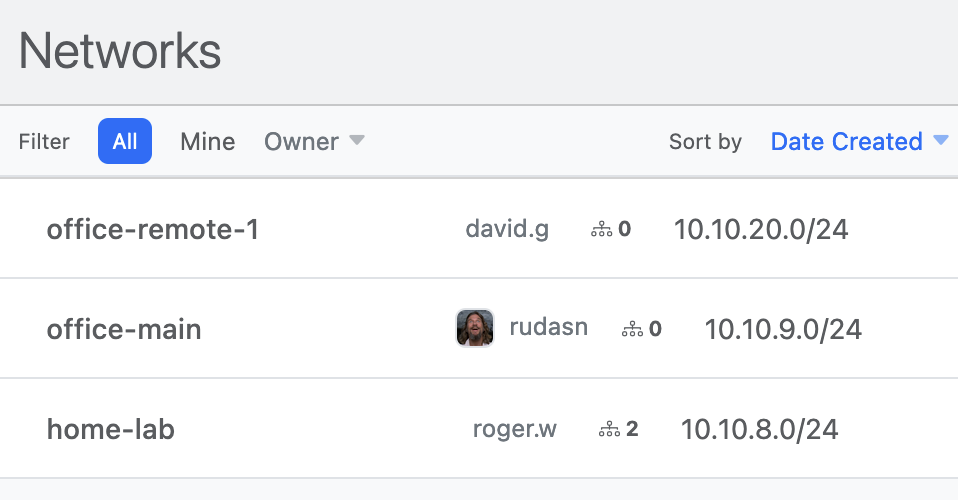
Connect multiple devices over one or more WireGuard Virtual Private Networks (VPN).
For example, a network called Home may be used
for all your family's personal devices,
and a network called Office may be used
for all your work-related devices.
A network-level CIDR of your own choosing,
like 10.10.0.0/24, is used to automatically assign
unique IP addresses to peers added to the network.
You can even specify default DNS settings to be applied to all connected devices.
2. Devices
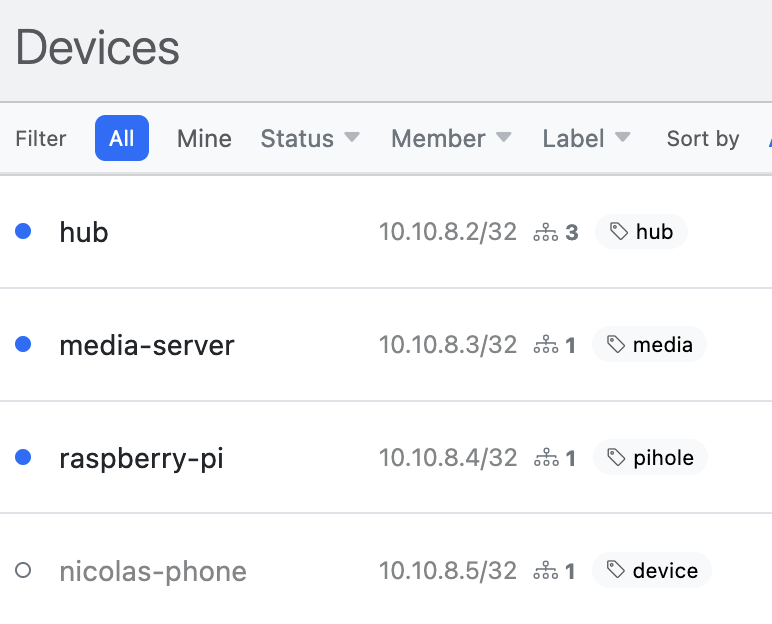
Add your laptops, phones, servers or any other WireGuard-enabled device.
Each device automatically gets an IP addresses
from the network CIDR, like 10.10.0.5/32,
and you may also specify additional addresses, like 192.168.65.5/32.
Using custom labels like pihole, media,
server:app-1, etc you can easily group and filter your devices.
3. Connections
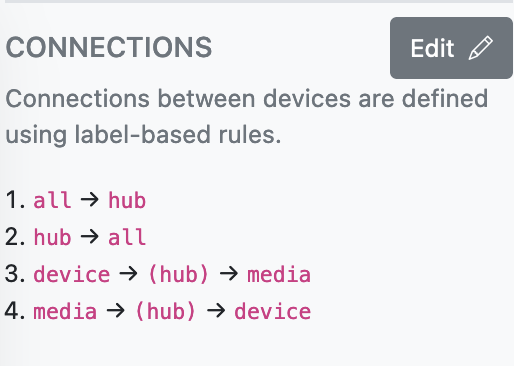
Label-based Access Controls, using device labels to define network peers.
Peering between devices is achieved via uni-directional label-based connection rules — both devices need to specify the connection using the labels applied to them.
You can also specify the AllowedIPs to be used for each connection
using keywords such as peers (only the IPs of the two peers),
network (the network CIDR),
and all (all traffic, 0.0.0.0/24).
For direct peer-to-peer connections,
PreShared keys are automatically generated
and shared between the peers by default.
And you can specify pass-through connections to describe Hub/Site topologies, Web Proxies, or VPN exit nodes.
4. Members
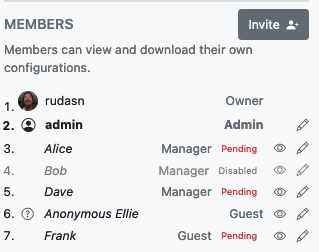
Invite friends, teammates and co-workers to claim their devices.
Simple Role-Based Access Controls to specify who gets to do what in your network.
Guests — for when you just want to securely share WireGuard Configuration files. Guests can only view devices assigned to them. No WireHub account required.
Members — for when you want people to manage their own devices. Members can add their own devices and view other network devices, but can only modify their own devices or those assigned to them.
Managers & Admins — when you want others to manage the network. Managers and Admins can invite new members, revoke memberships, create or modify connections, and make changes to network configuration.
Managers and Admins can also preview their networks from the perspective of other members to make sure everything's all right.
5. Interfaces
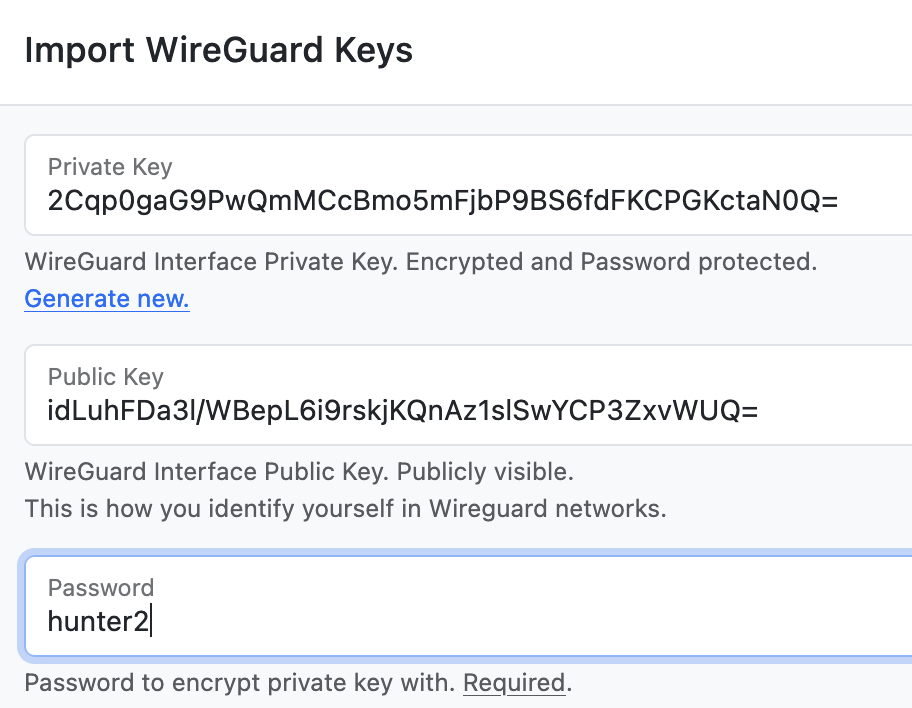
Securely store and manage your Private/Public Keys.
Interfaces represent the [Interface] section
of a WireGuard configuration file
— most importantly the Private/Public Keys.
As such, Interfaces are considered private to the user
that created them.
Once an Interface is assigned to a network Device, either by a network Manager or the device owner, its Public Key and Endpoint (if any) are shared with the Device's peers.
Private Keys, if shared with WireHub, are client-side encrypted using WebCrypto and password protected with a password that does not leave your browser — you really own your private keys.